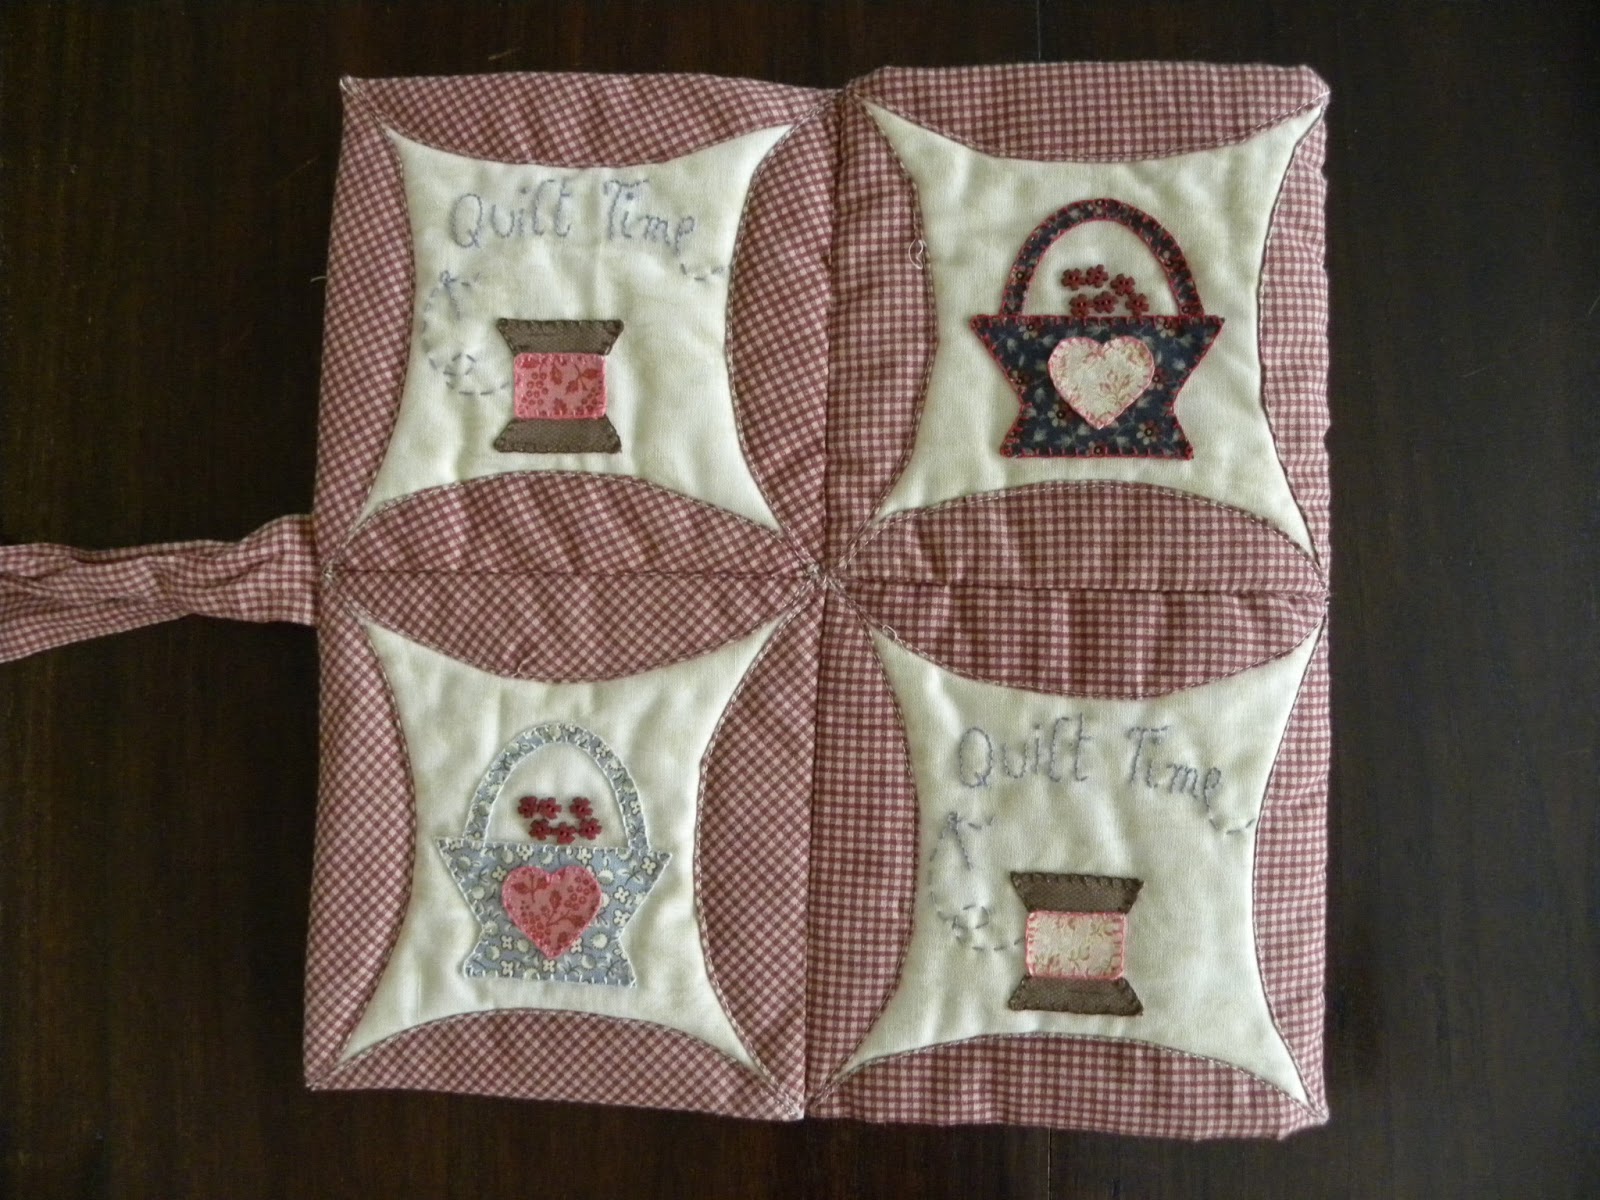
Voici une très jolie pochette de couture. C'est un modèle créé par Katie Lietaert-Ingels pour De Lander prévu pour un carnet à aiguilles mais lorsque je l'ai terminé, c'était vraiment trop grand pour des aiguilles, j'ai donc décidé de m'en servir pour mes projets d'appliqués.

I do put my pieces of fabric inside...
J'y mets mes petits morceaux de tissu...

My pieced blocs...
Mes blocs piécés...

I also attach a ziplock bag for my templates.
J'y attache un sac congélateur pour les gabarits.

Here are the directions to make one needle case:
- cut one circle of 10,6 cm radius in cardboard
- cut two circles of 11,6 cm radius in plaid fabric
- cut two 15 cm squares in light cream fabric
- cut two 15 cm squares in light-weight batting
Applique and decorate each cream square. I used the fusible applique technique and blanket stitched all around my appliques with contrasting embroidery thread (two strands).
Voici la marche à suivre pour réaliser un petit carnet à aiguilles:
- coupez un cercle de 10,6 cm de rayon dans du carton
- coupez deux cercles de 11,6 cm de rayon dans un tissu à carreaux
- coupez deux carrés de 15 cm dans un tissu beige clair
- coupez deux carrés de 15 cm dans du molleton
Décorez vos carrés beige d'appliqués de votre choix, de boutons et de broderie. J'ai utilisé du film thermocollant et j'ai décoré au point de feston tout autour de mes appliqués avec du fil à broder (2 fils).


Sew with running stitch all around the edge of the fabric circle (0,5 in). Place the cardboard circle on the wrong side of fabric circle, centering it, then pull your thread until your template is secured by the seam. Press well to mark the sewing margin. Remove the cardboard template. Repeat steps with other fabric circle.
Place one circle wrong side facing you, center one square of batting with one your applique squares on it. Fold the four sides carefully over your square. Stitch on the edge of the pretty fabric through all the layers.
Repeat the steps with your second square.
Assemble both finished square on one side with an invisible stitch placing your squares front to front, then turning over your squares to stitch again on the wrong sides.
Sew 3 rectangles of felt batting securely in the middle like the pages of a book.
Faites un point avant tout autour du cercle à 0,5 cm du bord. Placez le gabarit de carton au centre côté envers, et tirez sur le fil pour froncer et obtenir votre marge de couture. Repassez le tout et retirez votre gabarit. Recommencez l'opération.
Placez un cercle envers vers vous, centrez un carré de molleton puis le carré appliqué et repliez les quatre côtés du cercle sur votre carré. Cousez au ras du bord à travers les trois épaisseurs. Recommencez l'opération.
Assemblez les deux carrés finis par un point invisible sur un côté en les plaçant face à face. Retournez et cousez de la même façon envers contre envers.
Cousez trois rectangles de molleton de feutrine au milieu comme les pages d'un livre.

Be careful when laying your plaid circles so that the pattern is in the diagonal. I did not think of this when laying my circles and only realized it when my project was finished. You can see the difference here on the back of my sewing booklet here.
Attention à bien placer vos cercles à carreaux en diagonale. Je n'y ai pas pensé et me suis rendu compte de mon oubli trop tard, quand j'avais fini mon petit cahier. Vous pouvez voir la différence de positionnement du tissu sur l'arrière de mon cahier ici.
Montrez moi vos réalisations! Bonne couture!
No comments:
Post a Comment
Thank you for your comment, I'll try to reply promptly...
Merci pour vos commentaires, j'essaierai d'y répondre très vite...